
How to Create Custom Menus in WordPress
The first time I launched a WordPress site and looked at the navigation bar at the top, it had automatically populated with every page I’d ever created — including a half-finished “Test Page” I’d made while learning the editor, a draft “About Me” page, and somehow a page called “Sample Page” that WordPress had created by default when I installed it.
My navigation bar looked like a mess. Visitors to my site could literally see pages I hadn’t even finished writing yet.
I panicked and deleted those pages, which broke some internal links I’d already set up. Then I went to find out how to actually control what appears in my navigation — and discovered the custom menus feature, which I should have set up from day one.
If you’ve just launched a WordPress site, or you’ve been putting off sorting out your navigation because it feels fiddly, this guide walks you through the whole thing in a way that actually makes sense.
Why WordPress Navigation Can Get Messy Without Custom Menus
By default, WordPress automatically adds new pages to your navigation menu as you create them. That sounds convenient, but in practice it means your menu grows in a way you didn’t plan, often including pages you don’t want visible to the public yet, pages that are in the wrong order, or pages that just don’t belong in the top navigation at all.
Custom menus let you take full control — you decide exactly which pages, posts, categories, or custom links appear, in what order, and in which location on your site. Some themes support multiple menu locations (top navigation, footer, sidebar), so you can have completely different menus in different parts of your site.
Once you understand how to create one, it takes about five minutes and solves a lot of problems at once.
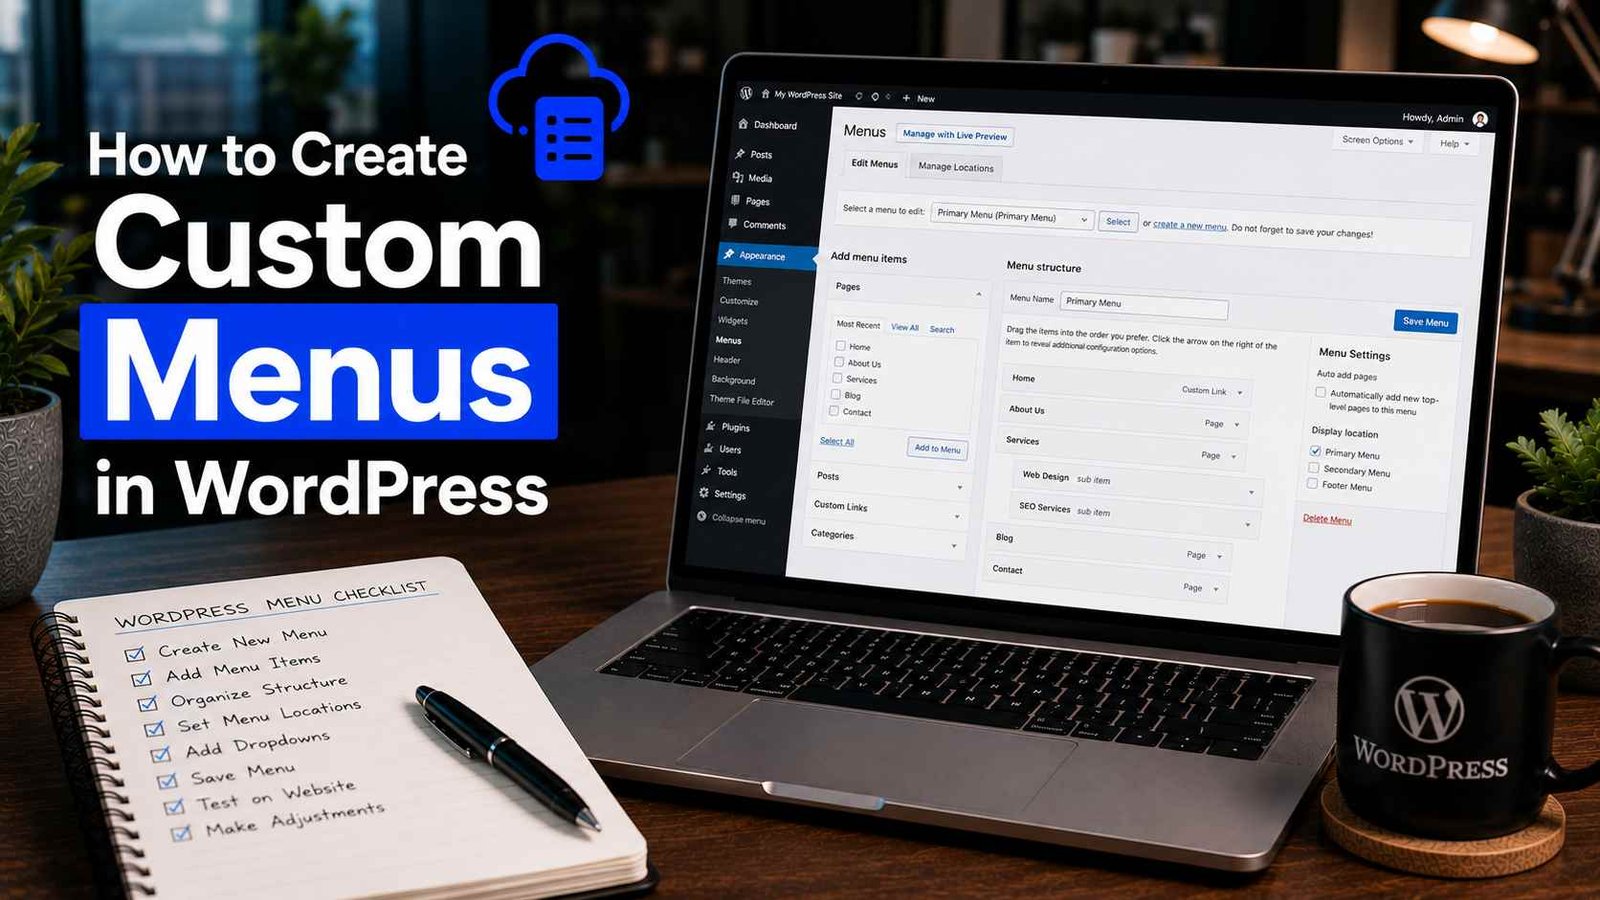
Step 1: Navigate to the Menu Settings
From your WordPress dashboard, go to Appearance → Menus.
If you’re using a newer WordPress theme that’s been built around the Full Site Editor (FSE), you might find this under Appearance → Editor instead, where menus work slightly differently. For most standard themes though — including popular ones like Astra, GeneratePress, Neve, and OceanWP — the classic Appearance → Menus screen is where you want to be.
Step 2: Create a New Menu
At the top of the Menus page, you’ll see a prompt that says something like “Select a menu to edit” with a link to “create a new menu.”
Click that link, give your menu a name — something descriptive like “Main Navigation” or “Header Menu” — and click Create Menu.
The name is just for your own reference inside WordPress. Your visitors never see it. I always name mine clearly (Main Navigation, Footer Links, Mobile Menu) so I can tell them apart at a glance when managing the site later.
Step 3: Add Items to Your Menu
On the left side of the Menus screen, you’ll see several expandable panels — Pages, Posts, Custom Links, Categories, and sometimes Tags or other content types depending on your setup.
Adding pages is the most common one. Click the “Pages” panel to expand it, and you’ll see a list of your existing pages. You can use the “Most Recent” tab to quickly find recent ones, or “Search” to find a specific page by name. Check the boxes next to whichever pages you want in your menu, then click Add to Menu.
Those pages will now appear in the menu editor area on the right side of the screen.
Adding custom links is useful for external URLs (like linking to your social media profile), or for creating a dropdown parent item that doesn’t actually go anywhere itself — I’ll explain that more in a minute.
To add a custom link: expand the “Custom Links” panel, enter the URL (or just “#” if you want a non-clickable parent label for a dropdown), type the link text you want displayed, and click Add to Menu.
Adding categories works the same way — useful if you want your navigation to link directly to blog categories rather than individual pages.
Step 4: Rearrange Your Menu Items
Once your items are in the menu editor, you can drag and drop them into whatever order you want. Just click and hold a menu item, then drag it up or down to reposition it.
This is where I spent way too long manually dragging things on one of my earlier sites because I didn’t realize there’s also a small arrow in the top right corner of each menu item that opens a text-based position editor, which is sometimes easier to use for precise reordering.
Step 5: Create Dropdown Submenus
This is one of the features I didn’t discover until embarrassingly late, and it makes a big difference for keeping navigation organized on content-heavy sites.
To create a dropdown, drag a menu item slightly to the right, underneath another menu item. When you let go, it should appear indented — this means it’s now a “child” of the item above it, and will show up as a dropdown under that parent item on your live site.
For example, on one of my blogs I have a “Resources” parent item in the navigation that has no URL attached to it (I used “#” as the URL for a custom link). Underneath it, indented, are three child items: “Recommended Tools,” “Free Guides,” and “Tutorials.” So when visitors hover over “Resources,” a dropdown appears with those three options.
It’s a clean way to organize multiple related pages under one navigation heading without cluttering the top-level menu with too many items.
Step 6: Assign Your Menu to a Location
Creating a menu and having it actually show up on your site are two separate steps — I made this mistake the first time and couldn’t figure out why my menu wasn’t appearing.
At the bottom of the menu editor (or sometimes in a panel called “Menu Settings” on the right), you’ll see a section called Display Locations or Theme Locations. This shows the available menu slots your theme supports — usually at least “Primary Menu” or “Main Navigation.”
Check the box next to the location where you want your menu to appear, then click Save Menu.
Different themes have different location names, and some support more locations than others. Astra, for example, supports separate Primary Navigation, Secondary Navigation, and Footer menus. If you’re not sure what your theme supports, it’s usually documented on the theme’s official page or just visible right there in the Display Locations panel.
Step 7: Edit or Update Your Menu Anytime
Your menu isn’t set in stone once it’s created. Going back to Appearance → Menus lets you add new items, remove old ones, reorder, or create entirely new menus for different locations at any time.
I go back and update my menus regularly — whenever I create an important new page or category that deserves to be in the navigation, or when I want to clean up items that aren’t relevant anymore.
Removing an item from the menu doesn’t delete the page itself — it just removes it from the navigation. That distinction tripped me up early on when I was worried about accidentally deleting content.
Real Example From One of My Sites
When I set up a tech blog a while back, I initially let WordPress auto-populate the navigation, then quickly realized the menu had:
- A “Sample Page” WordPress created during install
- Two unfinished category pages
- My privacy policy (which belongs in the footer, not the main navigation)
Using custom menus, I replaced all of this with: Home, Blog, Reviews, Guides, and About — five clean items that actually reflected what the site was about.
I also created a separate footer menu with links to the Privacy Policy, Contact page, and Disclaimer — all the legal/informational pages that need to be accessible but don’t belong in the main navigation bar cluttering things up.
The result was a much cleaner-looking site that was easier to navigate, and visitors from that point on were landing on the right pages instead of stumbling across half-finished content.
Common Mistakes to Avoid
Forgetting to assign the menu to a location. You can build a perfect menu and it won’t appear on your site until you check that Display Locations box. Easy to miss if you’re new to this.
Adding too many items to the top-level navigation. A menu with eight or nine top-level items starts looking cluttered, especially on mobile. Use dropdowns for related sub-pages and keep the top level to five or six items at most.
Including pages you haven’t finished yet. If a page is still a draft or under construction, don’t add it to the menu. Set the page to “Draft” status in WordPress and only add it to the menu when it’s ready to publish.
Not having a footer menu. A lot of beginners only set up the main navigation and forget about the footer entirely. Your footer is where visitors look for things like Privacy Policy, Contact, Terms of Use, and About — especially on monetized or affiliate sites where these pages are important for both trust and AdSense compliance.
Mixing up menus when you have multiple. If you have a main menu, footer menu, and maybe a mobile menu, it’s easy to accidentally edit the wrong one. Naming them clearly from the start (exactly as I mentioned in Step 2) saves confusion later.
Using the same menu in both header and footer. A main navigation menu with five pages in the header is fine. That same five-page menu in the footer looks odd. Your footer menu should usually be different — lighter, focused on legal and informational pages rather than primary navigation.
What About Full Site Editing (FSE) Themes?
If you’re using a block-based FSE theme like Twenty Twenty-Three or Twenty Twenty-Four, you won’t find the classic Menus screen under Appearance. Instead, navigation is handled through the Appearance → Editor using a Navigation block.
The logic is similar — you add, remove, and reorder menu items — but the interface looks completely different and uses the Gutenberg block editor rather than the classic drag-and-drop Menus panel.
If you’re a beginner, I’d honestly recommend sticking with a classic theme (Astra, GeneratePress, Kadence are all excellent options) until you’re comfortable with WordPress in general, because the classic Menus interface is genuinely more intuitive for learning the ropes.
Final Thoughts
Custom menus are one of those things that take maybe fifteen minutes to set up properly, and then just work quietly in the background making your site look and function the way it should.
If your navigation currently has pages in the wrong order, pages you don’t want visible, or no footer menu at all — spending a few minutes in Appearance → Menus will clean that up faster than you’d expect.
And if you’re building a new site, do this before you start promoting it to anyone. Your navigation is often the first thing a new visitor interacts with. Getting it right from day one makes a better first impression than almost any other small tweak you can make.
Any Question? Contact Us
